|
Installing Garmin 496 26 Feb 2007 |
|
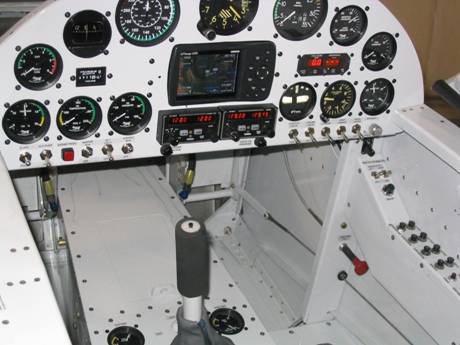
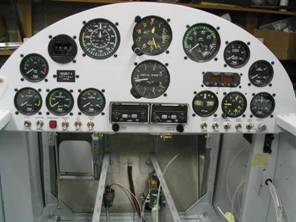
I didn’t choose a navigation unit when I originally designed the RV-4 panel; however, I planed it for later expansion once I selected a unit. Electronics change faster than other items so I left space above my Terra radio and transponder for extending the radio stack by removing the VSI. I also designed the spacing on each side of the altimeter for later replacement with a Dynon D-10A. My original “growth” layout with a Garmin 430 is shown below along with the “as built” picture. |
|
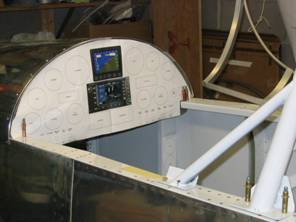
After some consideration and initial test flights of my aircraft, I decided to install a Garmin 496 in the panel. I didn’t have enough vertical space for the 4.25” AirGizmo docking system but enough for the 496. I began by disassembling the 496 front panel so that the outline dimensions could be accurately traced (this requires removing the small screws and them detaching the ribbon cable connecting the push buttons from the main unit). I traced the outline onto a piece of cardboard and cut it out, then I marked the position on the panel with a Sharpie. I cut inside the outline with a small cutoff wheel in a Dremel. Then a high speed burr trimmed to near the marks. I finished the cut with files and crocus cloth. When cutting and grinding, care must be taken to avoid overheating the metal to the point of burning or discoloring the paint. |

|
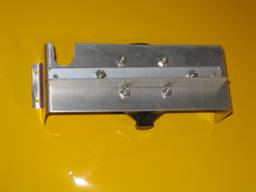
The yoke mount bracket that came with the unit was used to hold the 496. A simple 0.32” aluminum attachment was made to position the unit almost flush with the panel. The bracket will release the 496 by pressing a release point on the left. The release point is behind the panel, access is via a small hole in the panel allowing insertion of a tool. After mounting and testing the forward release, I discovered that because the unit pivots on the right bracket pin it doesn’t come straight forward and more side clearance was needed for the unit to rotate out (this could probably be avoided if the unit was designed to extend forward from the panel ¾ inch like a radio stack). I filed a little more side clearance because I want to be able to easily remove the unit for use outside the airplane and to upgrade it from my home computer. |